
You’ve decided to take the plunge and begin geocaching. Congratulations, you are ready for a fun adventure. This guide is designed to be used with Geocaching.com which is one of the larger social networking geocaching sites.
What you need:
- GPS receiver
- Internet connection (to get started)
IMPORTANT: If you have not used your GPS receiver, make sure to familiarize yourself with its operation prior to taking it out into the field. Make sure you take proper safety precautions and dress appropriately. Geocaching is an outdoor sport.
Getting Started (indoors)
1. Create account on Geocaching.com
2. Log into Geocaching.com
3. Navigate to “Hide and Seek a Cache” (menu, left side).
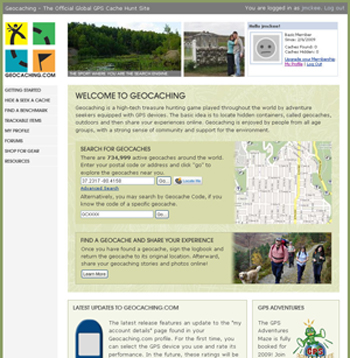
4. Enter location information (zip code, address, location).

5. View list of potential caches.

6. The search results will give you many different details about each geocache.
7. The left most column will have a compass direction and mileage; this is the direction and distance to the geocache from the search criteria that you provided above.
8. The Icons column gives details about the geocache itself, whether it’s a traditional, virtual or multicache geocache. Icons are also associated with trackable items (geocoins or travel bugs).
9. The (D/T) column gives information about the geocache physical size, as well as the difficulty and terrain. The bar graph indicates the size of the cache (left is small, right is large), the (1/3) indicates that the Difficulty is a 1 out of 5 and the Terrain is a 3 out of 5 (1 being the easiest and 5 the hardest).
The Placed column shows when the geocache was created or placed in its current location.
10. The Description column gives more details about the geocache. The information provided here (or though the link) can provide you with the history of the cache, a general description of the area where the cache is hidden, etc.
The Last Found column indicates the most recent discovery of the cache.
Finally, the last column (far right side) allows you to download the coordinates of the geocache directly to your GPS unit, by clicking the “Send to GPS” icon. Multiple caches can be downloaded at once by checking the box. Note that your GPS receiver must be “Geocaching enabled” for this option to work (check your user manual).
11. Enter the coordinates of the cache onto your receiver using one of two options: A. If your GPS receiver is not geocaching enabled (older models), then you will need to manually enter the coordinates of the cache into the GPS. You may need to refer to your user manual about how to use the little keyboard on the GPS receiver. B. If your GPS receiver is geocaching enabled, you do not need to manually type in the coordinates of the cache into you GPS receiver. You can download the coordinates of the cache directly to your GPS receiver from Geocaching.com.
Click the Send to GPS icon (far right hand side) to download way point information to your GPS unit. Follow any directions that the Web site prompts you to. You may have to install Garmin software.
A new internet browser “SendToGPS” window will open; click “Find Devices” and your GPS unit should be listed.

Click “Write”
You should receive the following message Geocache [name].gpx saved successfully. On your GPS unit, navigate to the Main Menu page.

Select Find & click Enter.

Select Waypoint & click Enter. Select the geocache you would like to locate.

Select Go To.

Follow the onscreen directions to locate your selected geocache. If it’s located near or off a trail, hike the trail then follow the onscreen directions.